 |
| The final result of my DIY photo card adventure |

Monday, May 7, 2012
DIY: Custom Graduation Photo Cards
Wednesday, May 2, 2012
Interesting Infrastructure: Caltrans and Music Notes
These photos are from Cotati, CA in the northern bay area. As you can see, Caltrans incorporated a music note motif into their new overpass project. Since Cotati is sort of a hippie town, and also home of an annual Accordian Festival, it fits the local vibe. The motif has a treble clef sequence and a bass clef sequence, and they appear on the sound walls, the retaining walls and on the actual overpass. I alternate between thinking this is really cool and thinking it is a huge waste of money, but here are the pics anyway:
.jpg) |
| Sound wall in final stages of project |
.jpg) |
| Overpass with alternating design |
Friday, March 30, 2012
GIMP: Adding New .gpl Palette
Palettes are very useful if you want to have a consistent color scheme. I find that having good colors readily available helps in the creative process as well. You can find great user-created palettes for free at kuler.com (link) and colourlovers.com (link); using these palettes can give your project a very professional look.
Wednesday, March 21, 2012
Arduino: Sending Hex Bytes to Serial Devices
I have been working on a project which involves an Arduino communicating serially with an LCD display device. Through a lot of trial and error, I finally figured out that when you want to send a HEX-encoded byte from the Arduino, you need to use the Serial.write() command rather than the Serial.print() command. The Serial.print() command works find when you are sending an ASCII byte but it will not work when you try to send a HEX byte. The right and wrong ways are below:
LINKS:
Similar problem and solution: http://www.arduino.cc/playground/Learning/SparkFunSerLCD
//Serial.print('U');  <----right (ASCII)
//Serial.write('U');  <----also fine (ASCII)
//Serial.print(0x55); <----WRONG! (HEX)
//Serial.write(0x55); <----right (HEX)
LINKS:
Similar problem and solution: http://www.arduino.cc/playground/Learning/SparkFunSerLCD
Thursday, March 1, 2012
STK 200: First Program (LED Blink)
For this program, you should already have AVR Studio 5 and AVRISP-U installed on your computer. If you don't, visit my previous post Getting Started Programming Guide (link). This is a simple program which simply makes the built-in LEDs to blink. I'm going to use C for this program because the code looks really simple. The assembly version is not really difficult either but we'll keep it simple for now. Note that AVR Studio 5 has a built-in C compiler. You might remember for AVR Studio 4, you had to download AVR GCC and integrate it. If you downloaded AVR Studio 5, you already have the C compiler.
What will the program do? If you look at the STK 200, there is a row of 10 LEDs numbered from 0 to 7 then "ISP" and "ON." These are the built-in LEDs. Our program will make the LEDs numbered from 0 to 7 blink on and off at a rate perceptible to the human eye. In microcontroller terms, this means physically connecting the LEDs to PORTB and sending alternating HIGH/LOW signals to PORTB. Note that is all output - no input. If you don't know what PORTB is, check my Basic Layout Guide (link).
Step 1 - Create a new project: Go ahead and open AVR Studio 5. From the startup screen, go to File>New>Project... and you should see a New Project dialog box. At the top left of the dialog box, select the C templates and then choose "C Executable Project" in the middle of the screen. At the bottom, fill in "blink" as the name and this should automatically fill the solution name field with the same text. Also, make sure that the "Create directory for solution" box is checked. This checkbox will not affect your code at all, but it will keep your AVRStudio folder better organized. Look at the picture below and make sure your screen looks the same:
 |
| STK 200: New Project Dialog Box |
Friday, February 17, 2012
STK 200: Getting Started Programming Guide
To start programming the STK 200, you need to download some software. Namely, you need AVR Studio and AVRISP-U. I talked about the basic layout of the board in a previous post (link), so check that out if some of the terms I am using are unfamiliar. I broke the process into three steps below.
Step 1 - Download AVR Studio 5: I started programming with AVR Studio 4, but if you are starting today, you might as well start with the new AVR Studio 5 release. The program is built using the Microsoft Visual Studio Shell (VSS) so the user interface is very similar to Visual Studio. I suppose this can be a good thing for those who like Visual Studio and a bad thing for those who don't. Overall, it seems to have a lot of convenient features such as IntelliSense and debugging interface.
So to get the software, go to the AVR Studio 5 page (link) from Atmel and download the software package you need. I recommend downloading the package that includes VSS and .NET 4.0. The software is completely free but you do have to fill out a registration form. The installer is pretty big (the one including VSS and .NET is over 600 MB).
 |
| STK 200: AVR Studio 5 |
Tuesday, February 7, 2012
Interesting Infrastructure: Mouse shaped wetland
Check out this satellite imagery from Petaluma, California, a city of about 60,000 people in the northern bay area. The city completed construction of a new wastewater treatment plant, the Ellis Creek Water Recycling Facility, in 2009 and they included some polishing ponds which had a very interesting shape. Environmental artist Patricia Johnson worked with the city and their consultants to make this wetland park a unique piece of artwork. The shape is a reference to the harvest field mouse, an indigenous species in the area near the Petaluma River. You can see the actual treatment facility towards the top right of the image.
 |
| Mouse shaped wetland: Raw image |
 |
| Mouse shaped wetland: Mouse outlined |
Wednesday, February 1, 2012
STK 200: Basic Layout Guide
The Kanda STK 200 has a lot of really cool features. But when I first got the board, I didn't even know where to begin. This post goes over the board's basic layout and the main features that it includes.
I/O: Really, the core function of a microcontroller is Input/Output. In fact, out of the ATmega32's 40 pins, 32 pins are set aside for I/O. They are organized into four 8-pin ports named PORTA, PORTB, PORTC, and PORTD. The STK 200 makes it really easy to access these ports by giving them each headers. The board even labels the headers using the standard naming convention established by the AVR family (PORTA, etc.). Each header includes it's own VCC and GND, which devices almost always require. LEDs and switches are probably the most common form of I/O; conveniently, the STK 200 has 8 LEDs and 8 switches built into the board. You can dedicate ports to the LEDs, the switches or both using a 10-pin ribbon cable provided with the board and pictured below. PORTB is lined up with the LED input header and PORTD is lined up with the switches output header for an easy connection.
I/O: Really, the core function of a microcontroller is Input/Output. In fact, out of the ATmega32's 40 pins, 32 pins are set aside for I/O. They are organized into four 8-pin ports named PORTA, PORTB, PORTC, and PORTD. The STK 200 makes it really easy to access these ports by giving them each headers. The board even labels the headers using the standard naming convention established by the AVR family (PORTA, etc.). Each header includes it's own VCC and GND, which devices almost always require. LEDs and switches are probably the most common form of I/O; conveniently, the STK 200 has 8 LEDs and 8 switches built into the board. You can dedicate ports to the LEDs, the switches or both using a 10-pin ribbon cable provided with the board and pictured below. PORTB is lined up with the LED input header and PORTD is lined up with the switches output header for an easy connection.
 |
| STK 200: I/O |
Friday, January 20, 2012
STK 200: Switching Microcontrollers
When I bought my Kanda STK 200, it was shipped with an ATmega8515 microcontroller. While the 8515 is a fine microcontroller, I wanted to replace it with an ATmega32 due to the latter's more robust features. Namely, the ATmega32 has 32KB of flash memory compared to the 8515's 8KB. Also, the 8515 has no built-in analog to digital or digital to analog conversion while the 32 does. If you are also interested in switching the microcontroller on the STK 200, here is a quick guide:
Sockets on the development board: When you look at the board, you can see various sockets. Check out the following image to see the available sockets and what their name is:
Sockets on the development board: When you look at the board, you can see various sockets. Check out the following image to see the available sockets and what their name is:
 |
| STK 200: Sockets on the Development Board |
Wednesday, January 18, 2012
Fundamentals of Engineering/EIT Exam Strategy
I wrote some general tips for the Fundamentals of Engineering Exam in a previous post (link). Here are test taking strategies to go along with those.
Overall strategy: Become an expert in the subject areas that you are most familiar with and know the basics of all other subjects. There is a reason the engineering profession is split into specialties (civil, mechanical, etc); there is so much to know that it is almost impossible to be an expert in everything. Furthermore, we all have our own ways to solve problems. Those thought processes might work especially well on certain subjects and not so well on other subjects. I found that it is much more productive to focus on the subjects that I have a background in rather than try to learn an unfamiliar subject from scratch.
Guessing: The entire test is multiple choice with four possible answers. This means that if you completely guess, theoretically you have a 25% chance to get the correct answer. Further, if you are able to eliminate one of the possible answers, you now have a 33.3% chance to pick the right answer. Eliminating two possible answers leaves you with a 50% chance and, according to my study manual, a passing score on the FE Exam is a bit less than 50%. So, theoretically, if you were able to eliminate two possible answers for every question on the test, you should pass. Of course, this is not practical. In reality, there are some questions where you absolutely know the answer and some questions where you have no idea, but this does highlight the effectiveness of strategic guessing.
 |
| FE Exam: Multiple Choice |
Guessing: The entire test is multiple choice with four possible answers. This means that if you completely guess, theoretically you have a 25% chance to get the correct answer. Further, if you are able to eliminate one of the possible answers, you now have a 33.3% chance to pick the right answer. Eliminating two possible answers leaves you with a 50% chance and, according to my study manual, a passing score on the FE Exam is a bit less than 50%. So, theoretically, if you were able to eliminate two possible answers for every question on the test, you should pass. Of course, this is not practical. In reality, there are some questions where you absolutely know the answer and some questions where you have no idea, but this does highlight the effectiveness of strategic guessing.
Tuesday, January 17, 2012
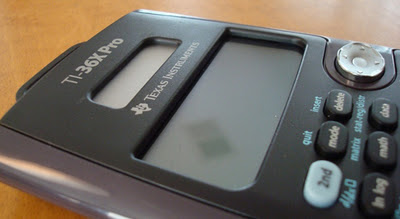
TI-36X PRO: Programming Bug Info (VIDEO)

I made a video to illustrate the bug, embedded below:
Friday, January 13, 2012
Fundamentals of Engineering/EIT Exam General Tips
I took the Fundamentals of Engineering Exam in October 2011. Two months later I received the results, stating that I passed (YAY!). Hopefully I can pass on a couple tips from my experience with the test!
Waiting time to get results: Like I said before, it took me two months to get my results. I took my exam on October 29, 2011 and on December 20, 2011 I got an email saying “Your results from your recent NCEES exam have been released. To access your results, log into your NCEES exam registration account.” When I logged into my NCEES account I was able to see a message stating that I passed. I got an actual letter in my mailbox about a week after that.
Calculator: The most important tip I can give is to get a good calculator and learn how to use it to the fullest extent. I’m partial to Texas Instruments (TI) calculators, so I looked up what was allowed for the exam. I found that, for TI branded calculators, “TI-36” must be part of the name. The most powerful calculator fitting that description was the “TI-36X PRO,” so I ordered it. I did a review of the calculator in a previous post (link). Bottom line is that it is a great calculator for this test. I know that some people take pride in doing calculations in their head, but during the morning portion, you will have so many questions to answer that you will likely be crunched for time. Some of the math questions on the morning portion will simply take a couple keystrokes on the right calculator. This time savings will help you when you reach the subjects you struggle with.
 |
| Pass the FE Exam |
Calculator: The most important tip I can give is to get a good calculator and learn how to use it to the fullest extent. I’m partial to Texas Instruments (TI) calculators, so I looked up what was allowed for the exam. I found that, for TI branded calculators, “TI-36” must be part of the name. The most powerful calculator fitting that description was the “TI-36X PRO,” so I ordered it. I did a review of the calculator in a previous post (link). Bottom line is that it is a great calculator for this test. I know that some people take pride in doing calculations in their head, but during the morning portion, you will have so many questions to answer that you will likely be crunched for time. Some of the math questions on the morning portion will simply take a couple keystrokes on the right calculator. This time savings will help you when you reach the subjects you struggle with.
Thursday, January 12, 2012
Product Review: Texas Instruments TI-36X PRO Calculator
Price: Under $30 (I bought mine from Amazon) And here is a link from officemax for $22.99:
TI-36X Pro Scientific Calculator 36PRO/1L1/A (Google Affiliate Ad)
Review: The TI-36X PRO is a calculator which seems to be designed specifically for standardized testing. Basically, it takes most of the features of an advanced graphing calculator, such as a TI-89, and puts them in a package that is allowed on your standardized test. I bought this calculator for the FE Exam and I as amazed at how much it could do.
Solver: One of the most powerful features is the numerical solver. You can enter any single variable equation and solve for the variable (a numerical result). This comes is so handy on a test where you are provided a formula and the variable you need to solve for is not isolated. You have to be a little careful, though. The numerical solver only returns one solution, even though if the equation you entered has multiple solutions, and there is no warning. The polynomial solver, on the other hand, does return all possible solutions. Obviously, the equation must be in the form of a polynomial to use this feature but usually that is not a problem. As if that wasn’t enough, there is also a system solver. This can be used when you have a 2x2 or 3x3 linear system of equations. This feature is somewhat duplicative since you can also just transform a representative matrix into reduced row echelon form (rref) on the matrix menu, but oh well.
Monday, January 9, 2012
Q&A: What is a development board?

Imagine if you had a microcontroller which could do all kinds of cool things but to be able to use it, you had to set up a bunch of circuitry and hardware on your breadboard each time. Obviously, this would get sort of frustrating, especially when there are circuits which are going to be the same every time, such as the power circuit. Also there are certain hardware circuits which greatly aid testing and debugging such as pushbuttons and LEDs. Having all of the hardware and circuitry already constructed makes life much easier and is much more conducive to experimentation and general prototyping.
Typical components of a development board include:
-power circuit; typically set up to run off of a 9V power supply
-programming interface; an easy way program the microcontroller from a computer
-basic input; usually buttons
-basic output; usually LEDs
-I/O pins; to be used for everything else, motors, temperature sensors, LCD screens, etc.
Probably the most popular and recognizable development board is the Arduino, and for good reason. The Arduino is exceedingly simple to use and even open source. But there are many, many other great development boards such as the BeagleBoard, the Chumby board and the TI Launchpad. Again, these are only boards that I have had contact with but there are many others.
Working with development boards can be educational, fulfilling and fun. Go ahead and try working with one and I bet you will learn something new.
LINKS:
This is an incredible resource from Hack A Day: http://hackaday.com/2011/02/01/what-development-board-to-use/
Wikipedia on development boards: http://en.wikipedia.org/wiki/Microprocessor_development_board
Subscribe to:
Posts (Atom)